
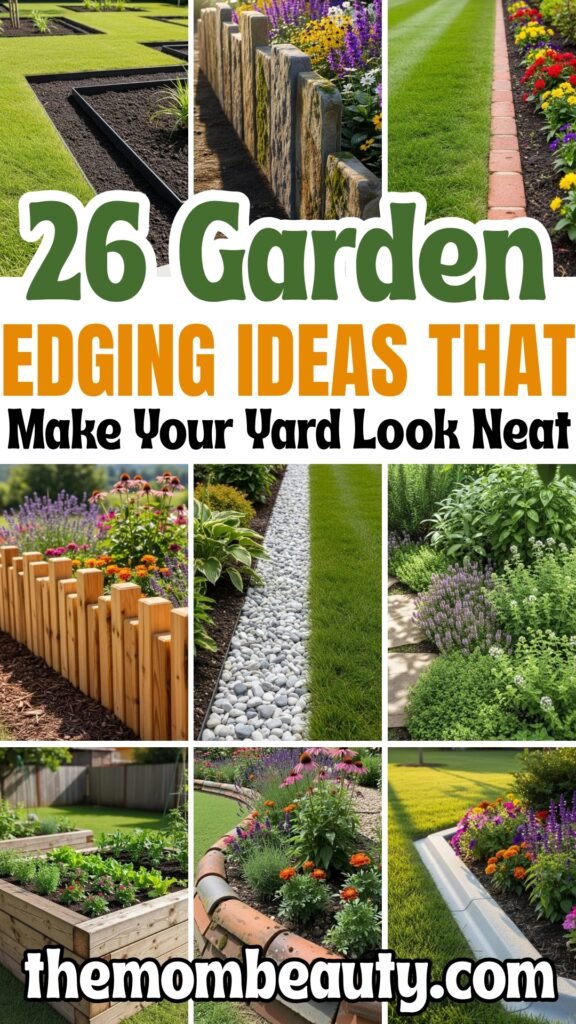
26 Garden Edging Ideas For 2026

You can spend hours planting flowers, mowing the lawn, and pulling weeds yet your garden still looks messy.
That’s usually not the plants. It’s the edges. Grass creeps in, soil spills out, and nothing looks finished no matter how hard you try.
If you’ve ever stood there wondering what you’re doing wrong or which edging actually works, you’re not alone.
In this Article, you’ll explore 26 practical solutions for designing a Garden Edging Ideas in 2026.
How Can You Edge a Garden On A Budget?
If you think garden edging has to be expensive, that’s the first myth to drop. You don’t need fancy materials or professional help to get clean edges.
If you work with what you already have like bricks, stones, or even soil – you can create strong borders without spending much.
The key is choosing edging that stays in place and doesn’t need constant fixing. When you focus on simple materials and smart placement, you save money upfront and avoid repairs later.
Save this article for later! 👇👇
How Do You Choose The Right Edging Style For Your Garden Design?
Start by looking at how your garden is actually used. If people walk through it often, you need edging that won’t shift. If your space has curves, flexible edging will save you effort.
A modern garden looks better with clean lines, while a natural garden works best with stone or plants. Don’t choose edging just because it looks good online.
Choose it because it matches your layout, your maintenance level, and how much time you want to spend fixing it later.
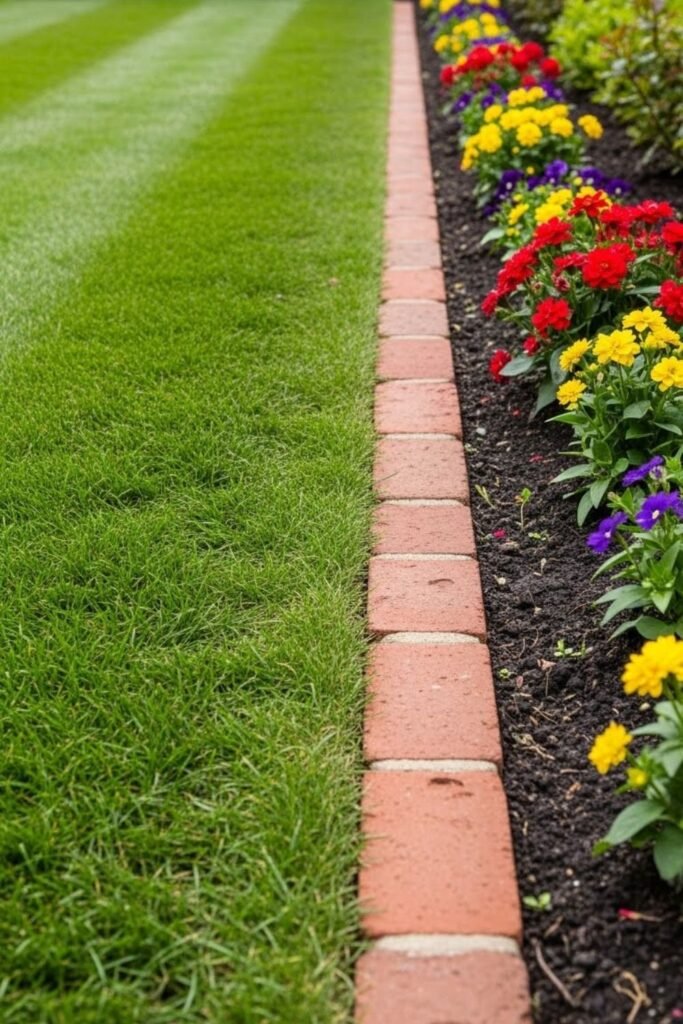
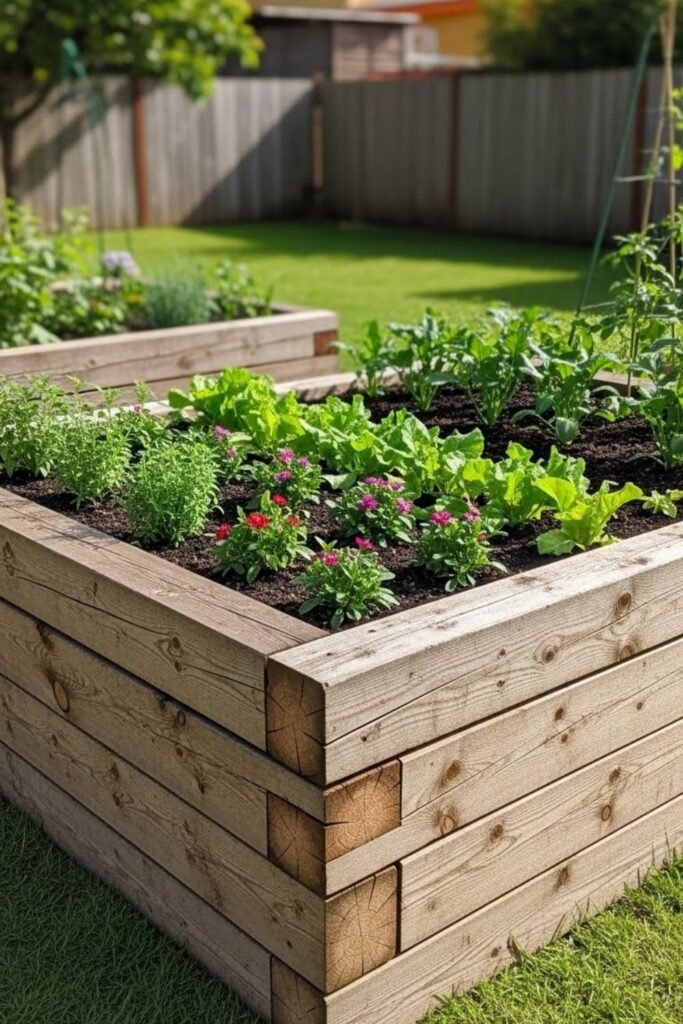
Brick Flush
I learned early that lawn edges look messy when bricks sit too high. I set bricks level with the grass so the mower can roll straight over them without catching.
If you want clean cuts and less trimming, this matters. Bricks work best when packed tightly on a firm base, otherwise they shift.
I like this option because it stays subtle, lasts for years, and doesn’t scream for attention while quietly keeping grass where it belongs.
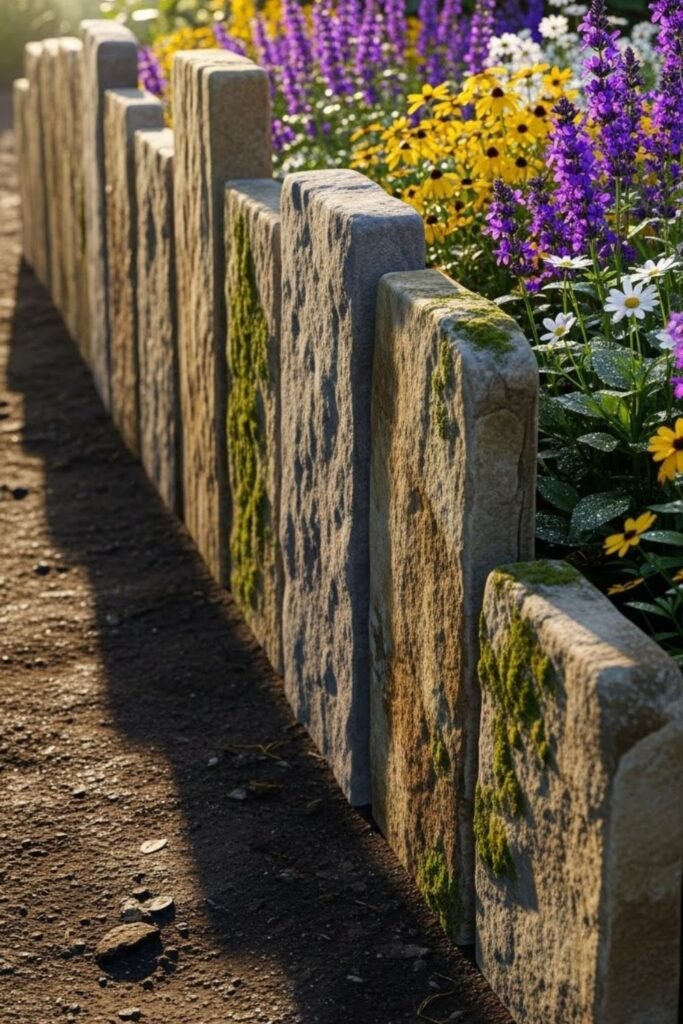
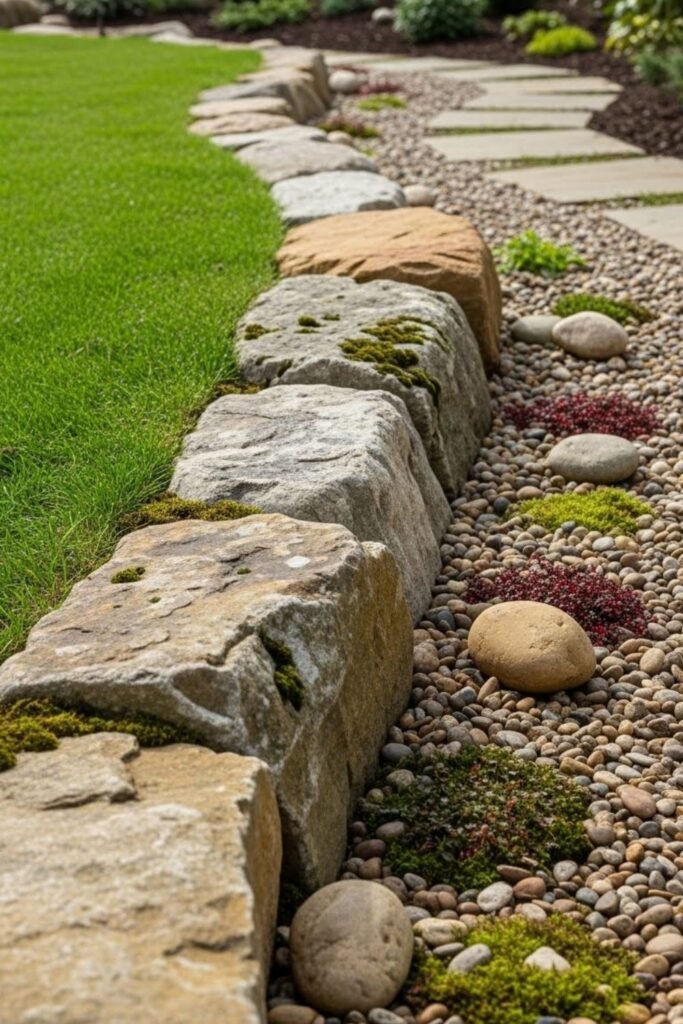
Stone Vertical
Standing stones upright changed how my borders held their shape. Instead of laying them flat, I push stone slabs deep into the soil.
So they act like a wall underground.If you want an edge that doesn’t move after heavy rain, this method helps.
I space stones close enough to block roots but loose enough to look natural. It takes more effort upfront, but once done, there’s very little fixing later.
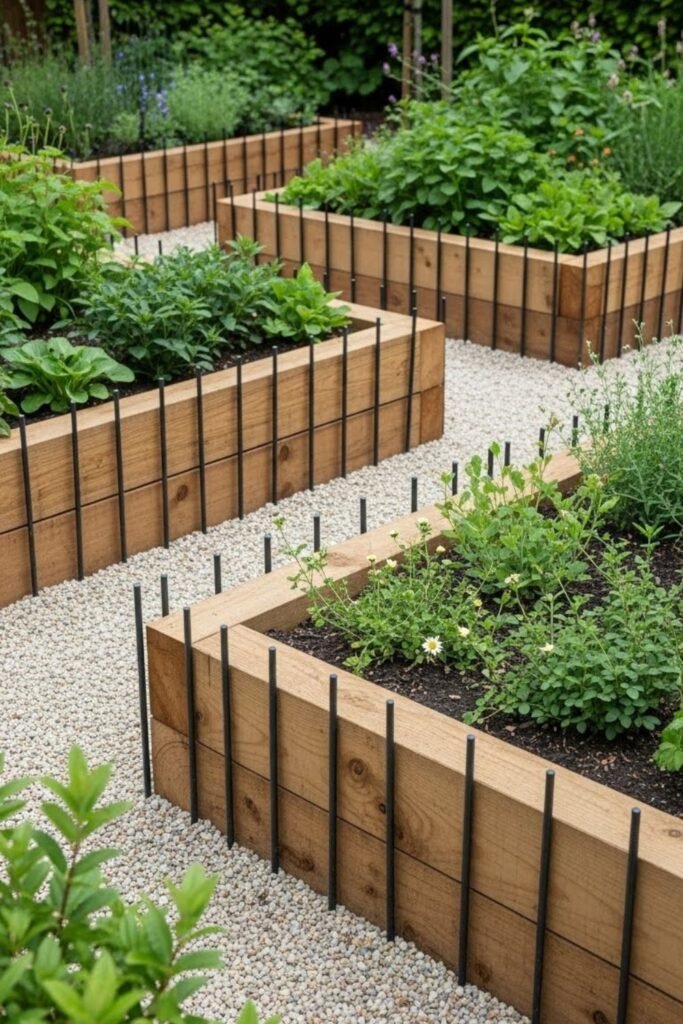
Steel Lines
Sharp edges are hard to fake, so I rely on steel when I want precision. Thin metal strips slide into the soil and create a crisp boundary without adding bulk.
If your garden has straight paths or modern shapes, steel keeps everything looking intentional.
I always sink it slightly below ground to hide the material and stop tripping hazards. Over time, it blends in visually while holding its line better than most soft materials.

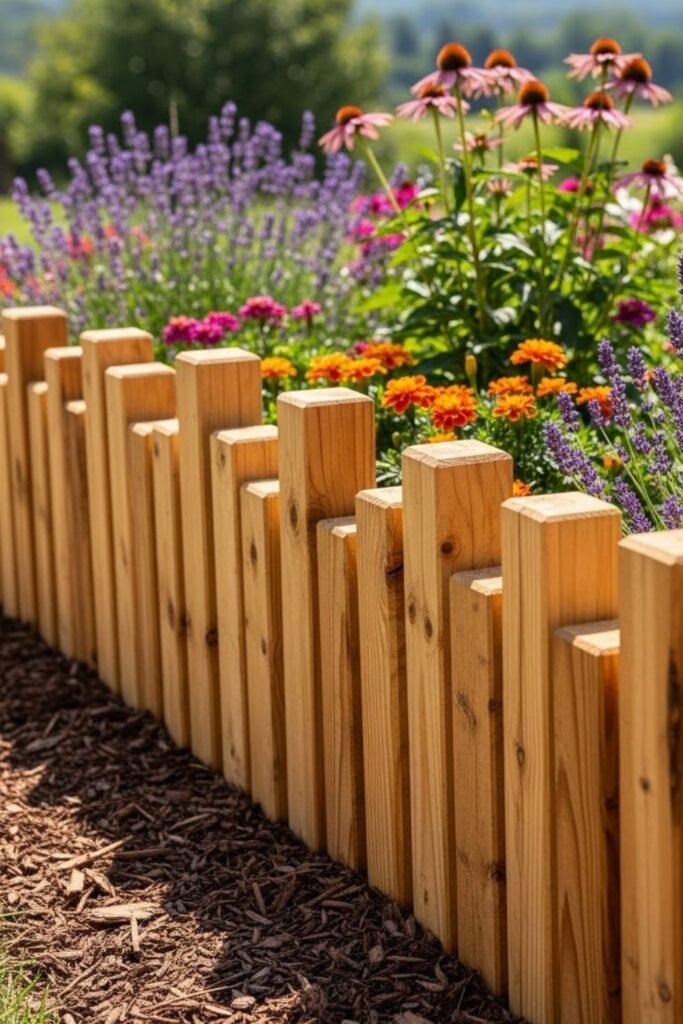
Log Upright
Using log ends upright gave my garden a warmer, relaxed feel. I cut logs to equal height and bury them halfway into the soil so they don’t tip over.
If you like a rustic look without spending much, this works well. I treat the wood first because untreated logs rot fast.
This edging suits informal gardens and curved beds, especially when you want something that feels handmade and natural rather than perfect.
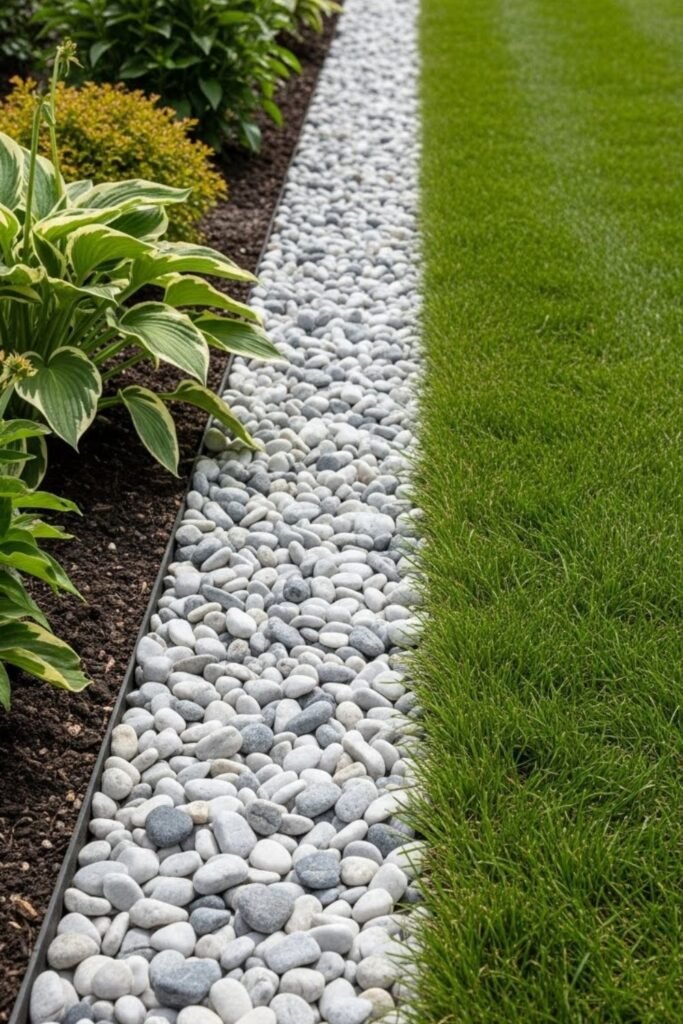
Gravel Trench
Grass stopped invading my beds once I cut a narrow trench and filled it with gravel. I dig straight down, keep the line clean, then add landscape fabric before pouring stone.
If you want a budget edge that drains well, this does both. Gravel shifts less when it sits below soil level. I refresh it once a year, which beats constant trimming.
The contrast also helps beds stand out without adding hard structures and keeps maintenance simple over long seasons.
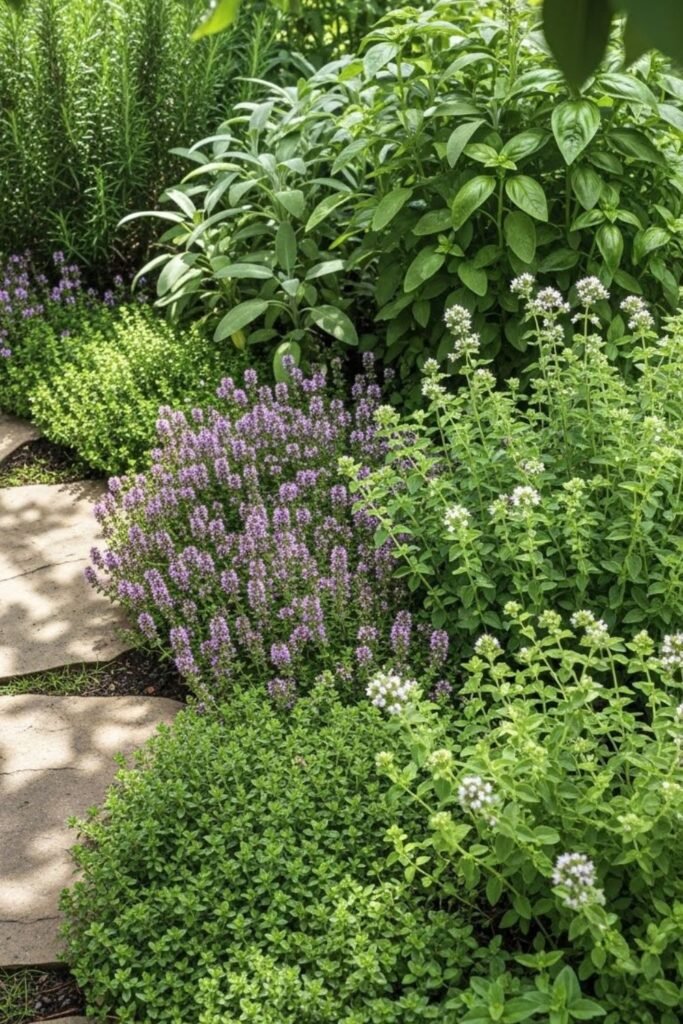
Living Herb
I wanted edges that did more than just sit there, so I planted herbs as borders. Low growers like thyme and oregano stay tidy and smell great when brushed past.
If you cook often, this edge pulls double duty. I trim it regularly to keep lines clear, otherwise it spreads.
Sunlight matters here, so I only use this where plants stay healthy and strong year after year without demanding chemicals constant watering or extra materials from outside sources at all.
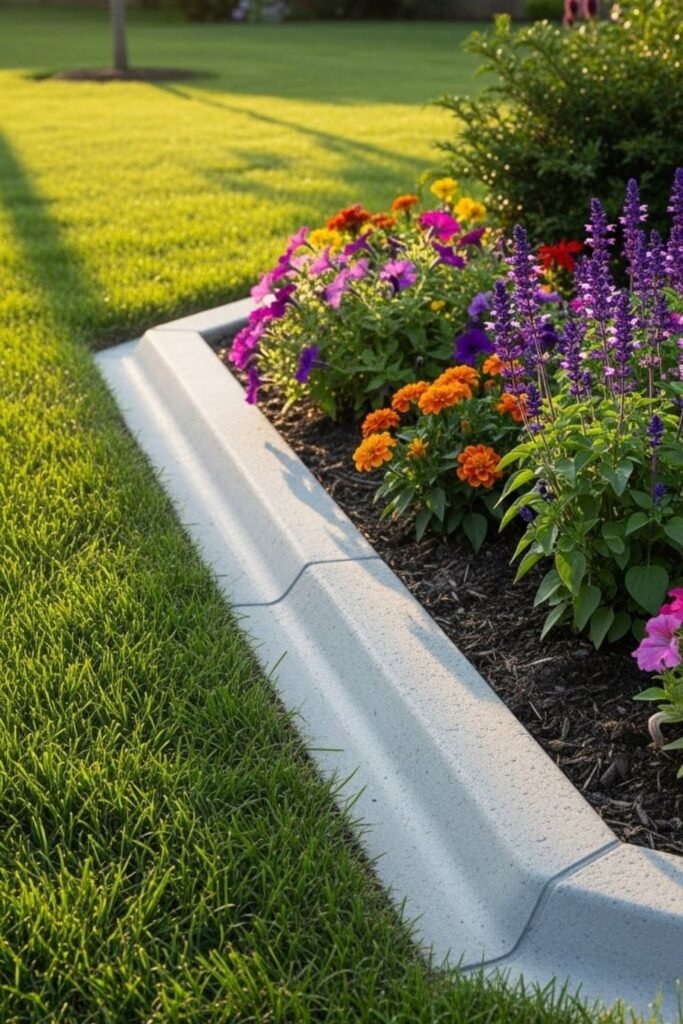
Concrete Curb
Pouring a concrete edge felt intimidating until I tried it once. I set simple forms along the bed, mixed concrete, and poured it in place. If you want something permanent, this delivers.
I keep the curb low so it blends instead of dominating. Expansion gaps matter, otherwise cracks show fast. After curing, maintenance drops to almost nothing.
Which makes the effort worth it for busy schedules when weather changes and soil movement no longer cause problems around garden edges everywhere.
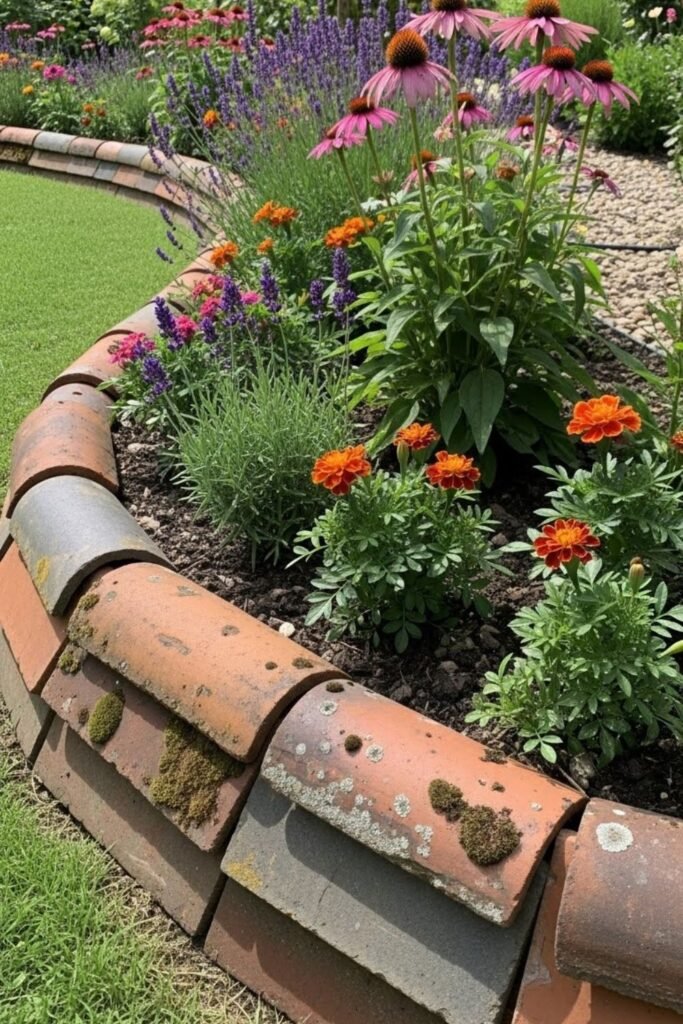
Reclaimed Tiles
Old roof tiles gave my borders character without buying new materials. I lay them sideways with the curved edge facing up to block grass. If you like reused materials, this adds charm fast.
Weight keeps them stable, but a shallow trench helps alignment. I vary colors slightly so it looks intentional, not random.
This edge works best in dry areas where tiles stay clean and visible after rain and require little maintenance across seasons with minimal ongoing effort from you.
Sleeper Raised
Heavy sleepers solved my problem with uneven ground. I stack treated wood sleepers to create a low raised edge that holds soil in place. If your garden slopes, this keeps beds from washing out.
I anchor them with stakes so they don’t shift over time. Height gives planting more depth and improves drainage.
This option needs planning and strong materials, but once installed, it defines spaces clearly and reduces erosion while giving the garden a solid, structured look year after year.
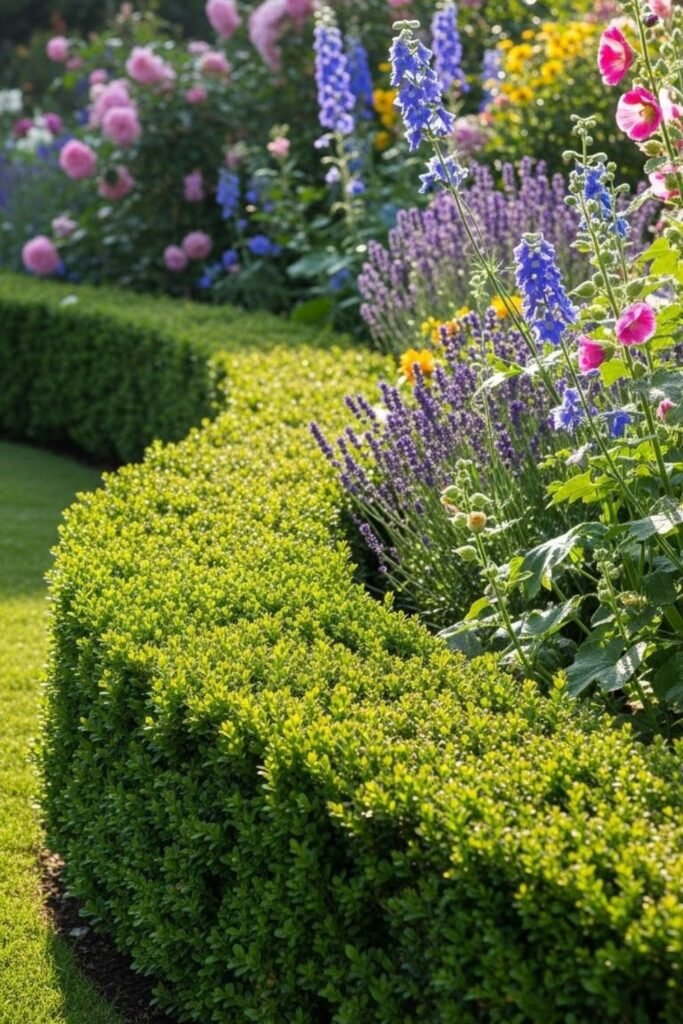
Hedge Soft
Trimmed hedges give edges a gentle, natural feel without hard lines. I use slow-growing plants so shaping stays manageable. If you enjoy light upkeep, this option adds movement and texture.
Regular trimming keeps grass from creeping through. I avoid tall varieties because low edges look intentional and don’t block views.
This style suits traditional or cottage gardens where straight lines feel too harsh and softer borders help everything blend together naturally over time without constant fixing.
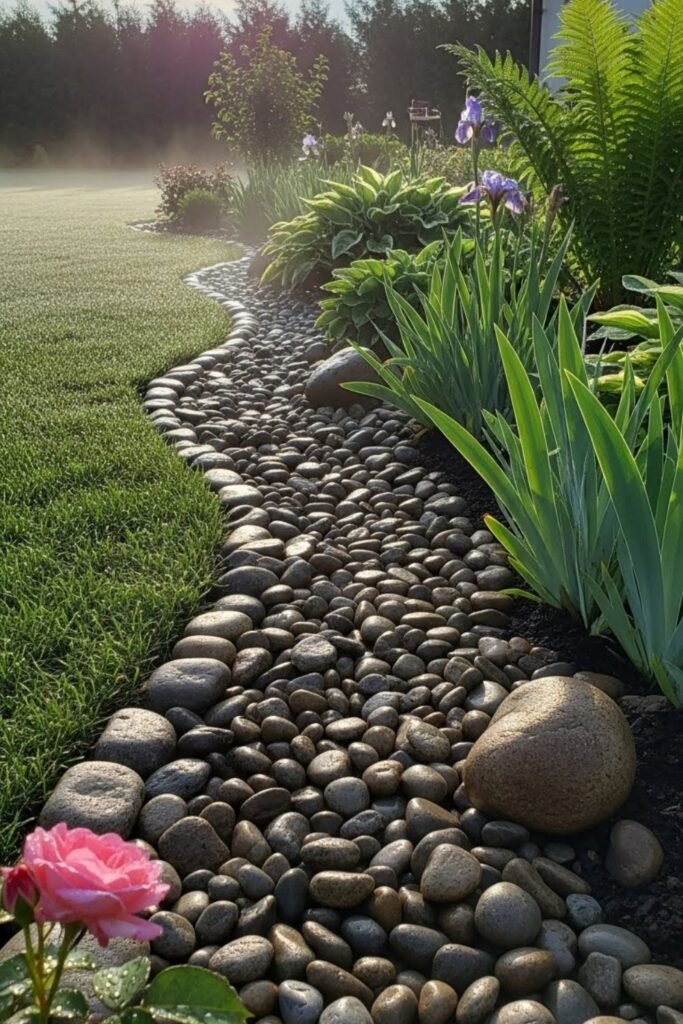
River Channel
Rainwater used to flood my beds until I added a river rock channel. I dug a shallow groove and filled it with smooth stones to guide water away. If drainage is an issue, this solves two problems at once.
Rocks stay put and stop soil spillover. I keep edges clean by setting stones slightly below grade. It’s practical, low effort.
And visually calming, especially after rain when water flows exactly where it should without damaging surrounding plants.
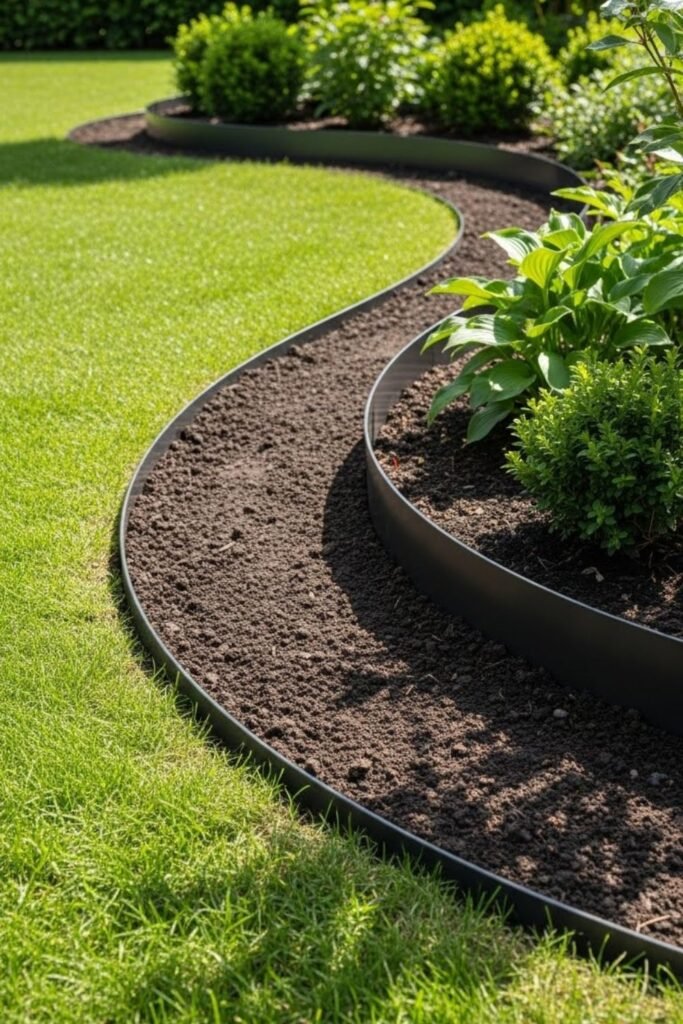
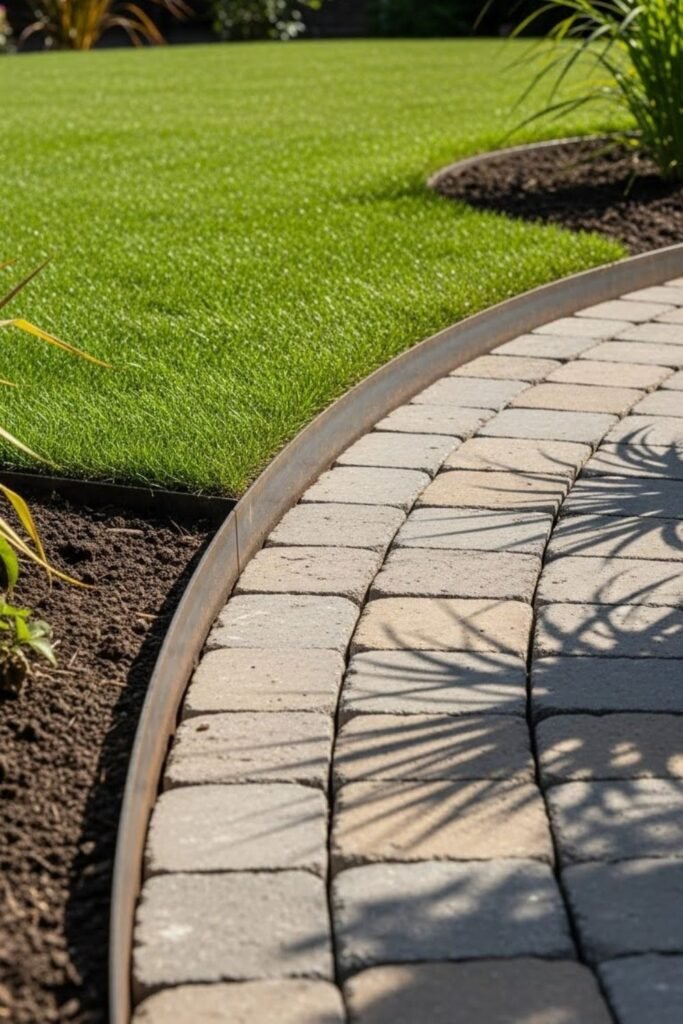
Metal Curve
Curves used to frustrate me until I switched to flexible metal edging. I shape it by hand and press it into the soil along winding beds.
If your garden avoids straight lines, this saves time and stress. Stakes lock it in place so shapes hold through seasons. I bury the top edge slightly so metal disappears visually.
This keeps borders clean while allowing freedom in design without constant realignment or patching after weather changes or regular foot traffic.
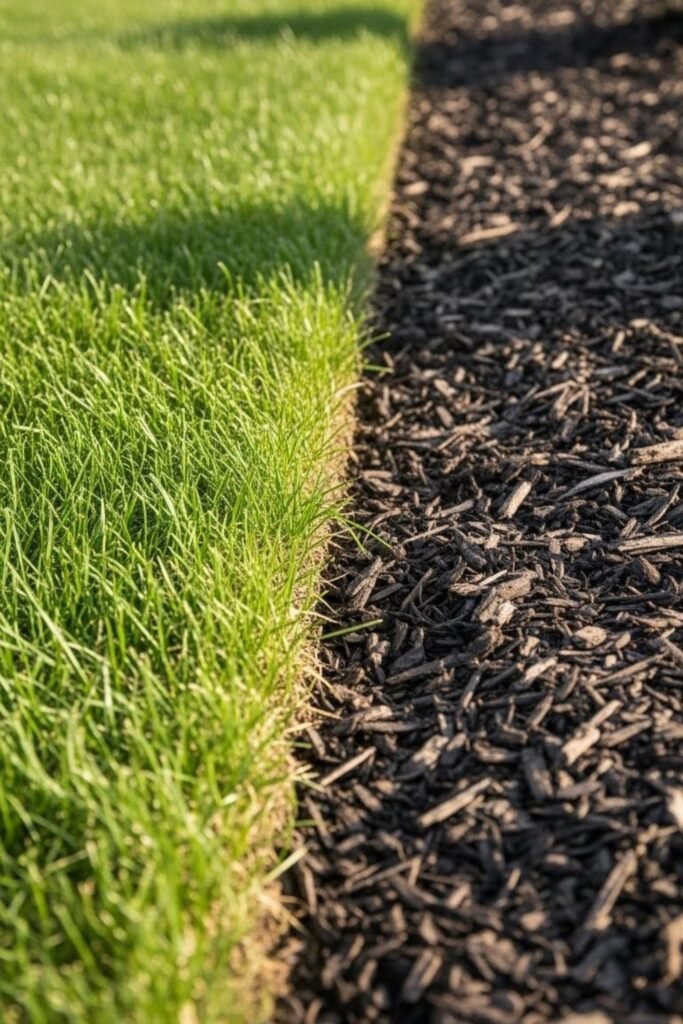
Mulch Cut
A sharp spade changed how I handle simple edges. I cut a clean line between lawn and bed, then keep mulch pulled back from the grass.
If you want the cheapest option, this works immediately. The trick is re-cutting once or twice a season so the line stays visible. I like this method for quick refreshes and temporary beds.
It looks natural, costs nothing, and gives control without installing materials or committing to a permanent structure at all.
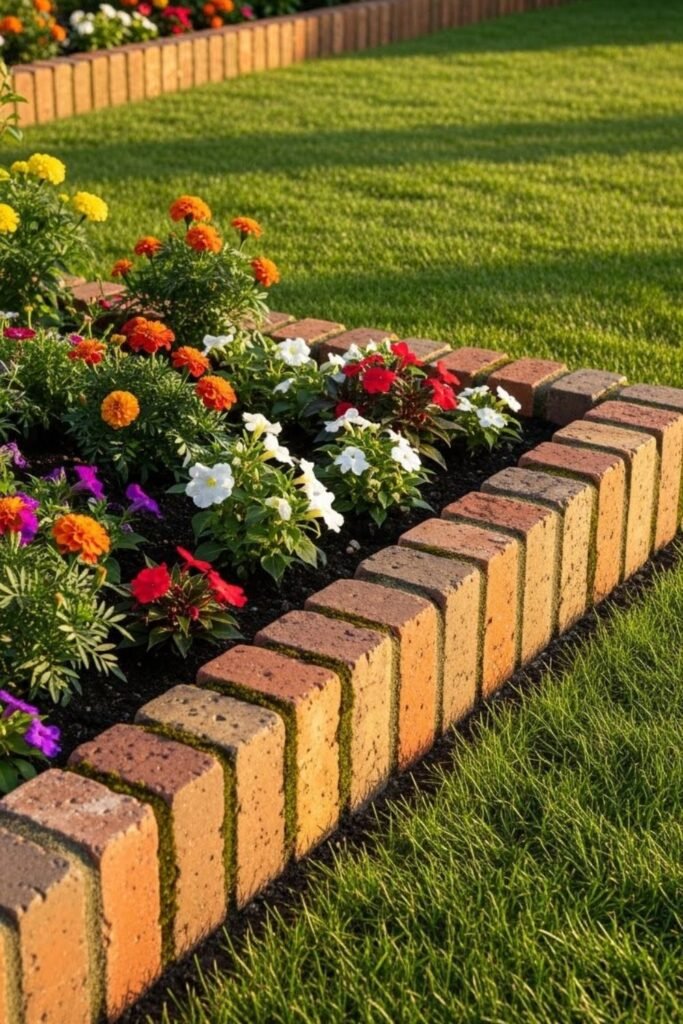
Brick Edge
Turning bricks upright gave my borders a classic look that doesn’t fade. I dig a narrow trench, stand bricks on their side, then lock them in with soil.
If you want durability without concrete, this balances both. Upright bricks stop grass roots better than flat ones. Spacing needs attention, or gaps appear.
I use this where paths meet beds because it handles foot traffic well and keeps lines straight even after heavy rain or frequent use.
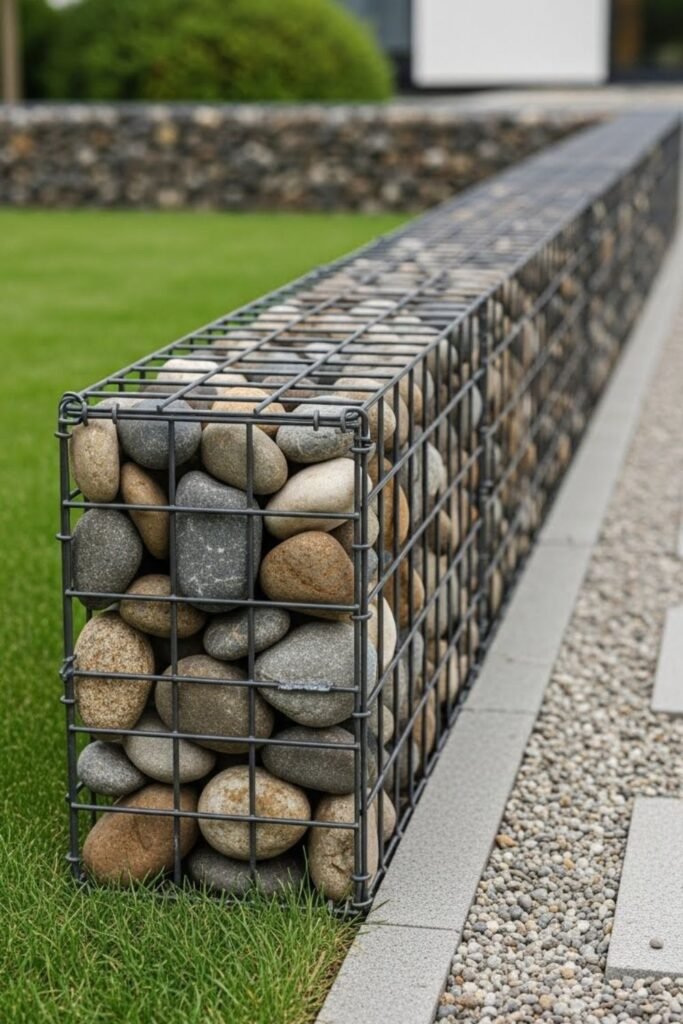
Gabion Mini
Wire cages filled with stone sounded excessive until I scaled them down. I use short sections to create compact borders that hold shape and weight.
If erosion is a problem, this helps instantly. Stones don’t move, and the structure drains well. I place them where beds meet slopes or paths.
Assembly takes time, but once set, there’s no shifting. This edge feels solid, modern, and reliable without needing concrete or deep digging work.
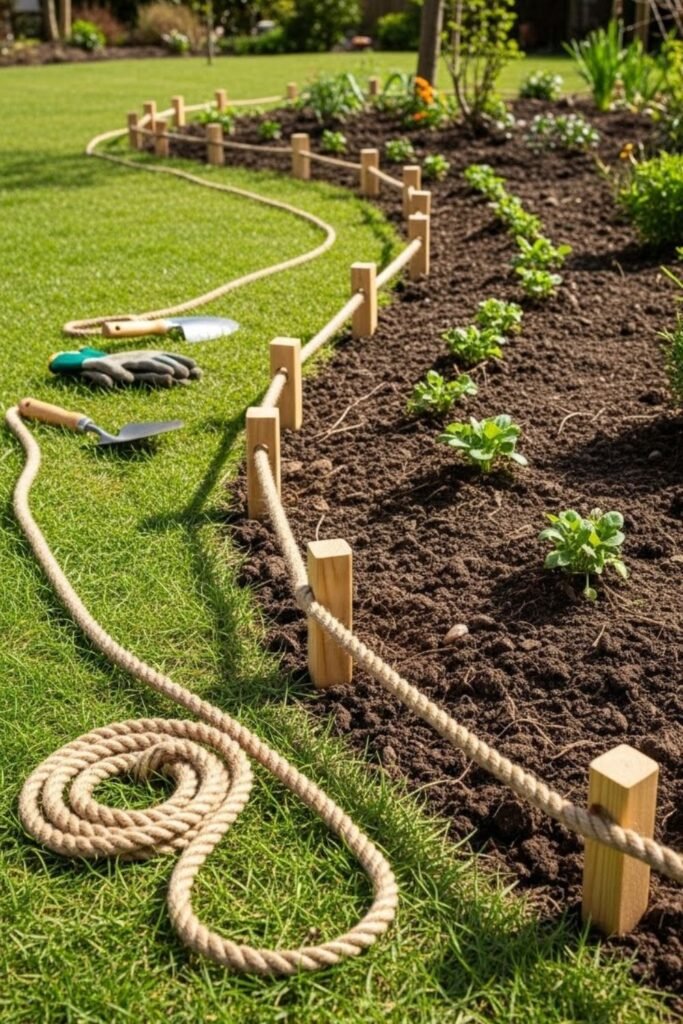
Rope Guide
Temporary beds need flexible solutions, so I use rope and pegs to mark edges. I stretch rope tight along the border and adjust until the line feels right.
If you’re planning changes, this avoids commitment. I cut and trim along the rope, then remove it once the edge forms. It’s simple, fast, and great for testing layouts.
This method helps visualize spacing before installing anything permanent, saving effort, money, and frustration later on.
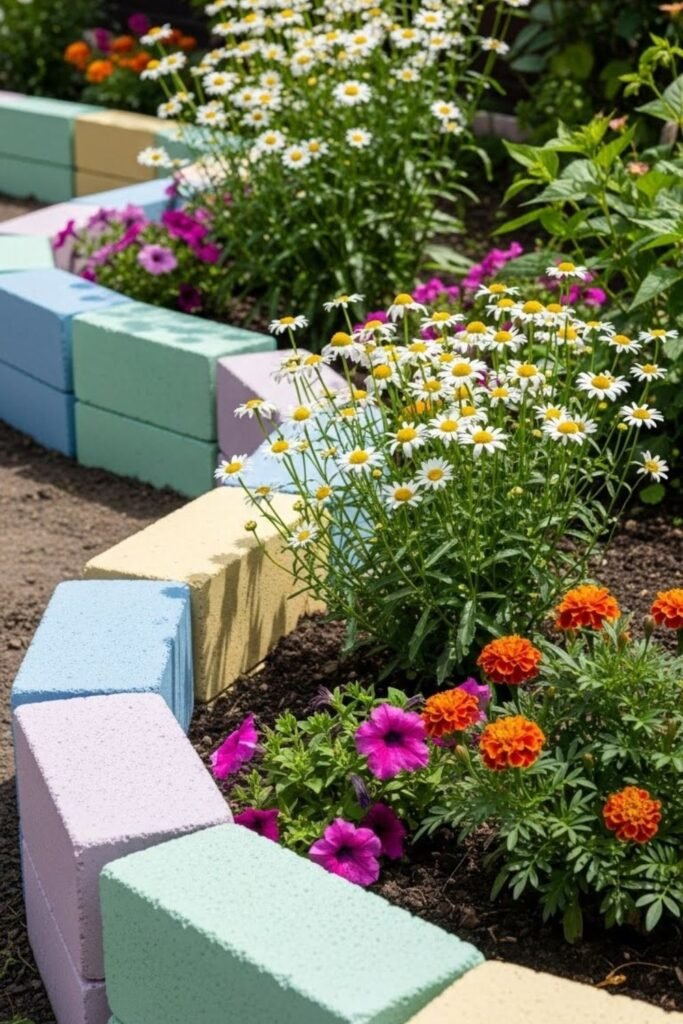
Block Accent
Color changed how plain concrete blocks felt in my garden. I painted the exposed sides and stacked them low along the bed edge.
If you want something playful without losing strength, this works well. Blocks stay heavy enough to resist movement, and paint helps them blend or stand out.
I leave small gaps for drainage so water doesn’t pool. This option suits casual spaces where perfection isn’t the goal, but clear separation still matters every season.
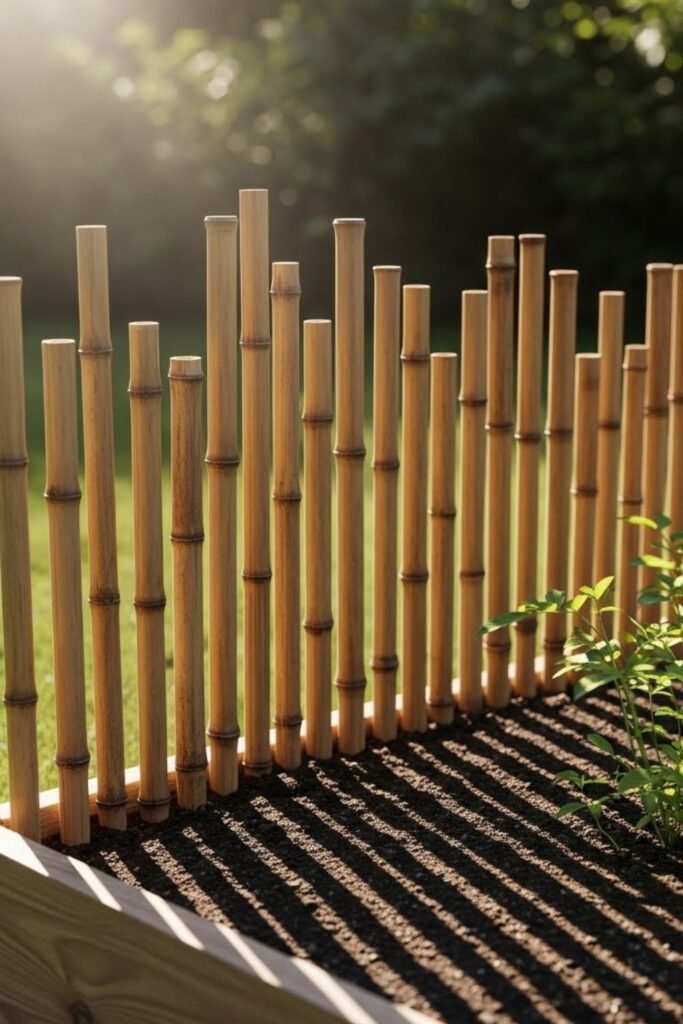
Bamboo Light
Lightweight borders made sense once I tried bamboo canes. I cut them evenly and tie them together before pushing them into the soil.
If you like flexible, low-cost materials, bamboo delivers. It bends slightly instead of snapping and handles curves easily. I seal the ends to slow rot, which extends its life.
This edging works best in smaller beds where heavy materials feel overwhelming and a softer, natural look fits the space better.
Plastic Hidden
Hiding plastic edging solved my biggest complaint about cheap borders. I install it below soil level so grass hits a barrier without showing the material.
If you want function without visual clutter, this matters. Stakes keep it from lifting, which is where most people go wrong.
I check it once a year and reset any loose sections. Done right, plastic works quietly in the background while edges stay sharp and trimming time drops.
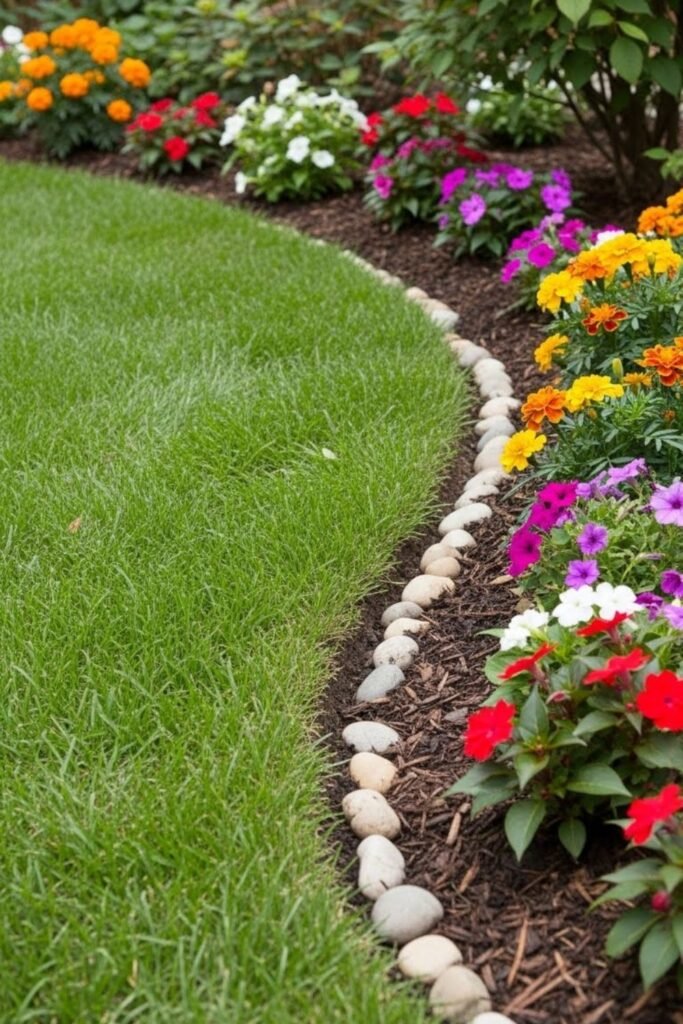
Mixed Stone
Combining stone with gravel helped me control messy transitions. I set larger stones first, then lock them in place with gravel around the base.
If your soil shifts often, this combination adds stability. Gravel fills gaps and improves drainage, while stones define the line.
I use this where beds meet paths because it handles foot traffic well. The mix feels natural, flexible, and forgiving without looking unfinished or random once settled properly.
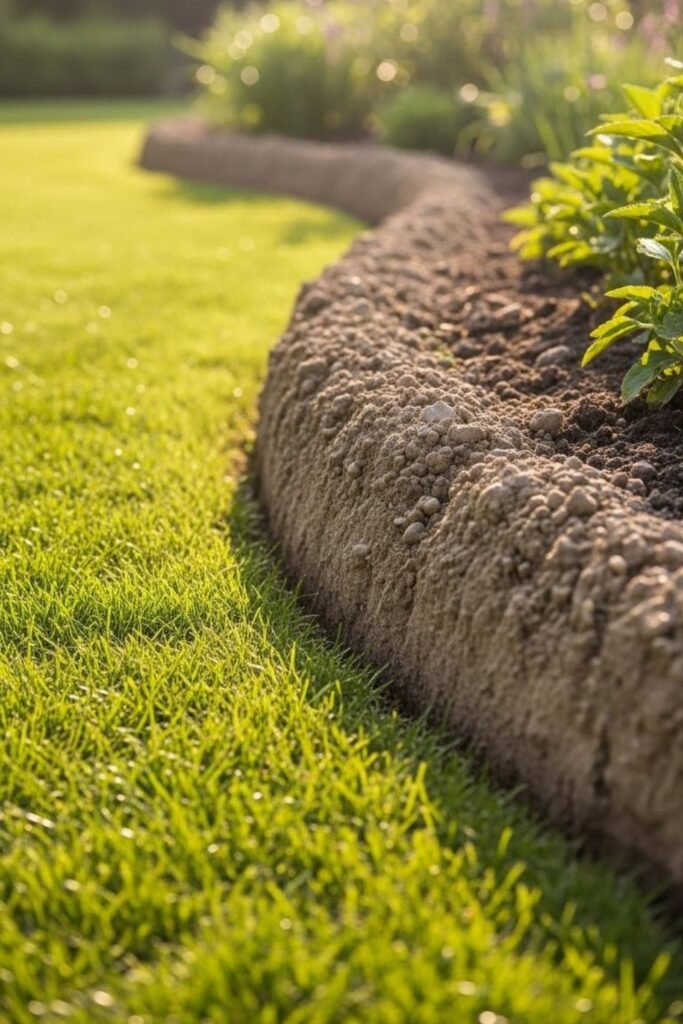
Soil Ridge
Building a low soil ridge helped me separate spaces without adding materials. I mound soil slightly higher along the edge and pack it firm so it holds shape.
If you want a natural look, this feels right. Grass stops at the slope, and mulch stays inside the bed. I refresh the ridge after heavy rain, which doesn’t take long.
This option works best in calm areas without foot traffic and gives control while keeping everything simple, flexible, and easy to adjust as the garden changes.
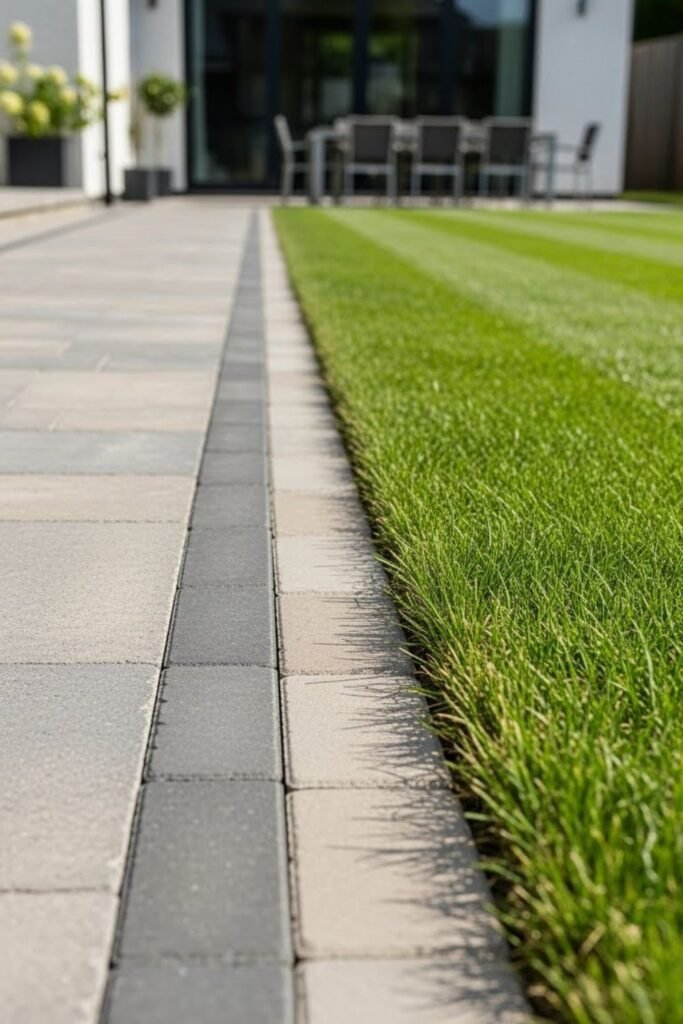
Paver Strip
Laying pavers level with the lawn solved trimming headaches fast. I dig a shallow base, set pavers flush, and lock them in tight. If mowing efficiency matters to you, this edge delivers.
The mower rolls cleanly across without catching, saving time every week. Pavers handle weight well, so paths and beds stay defined.
I choose neutral colors so they blend naturally. This method costs more than basic options but pays off in long-term ease and durability.
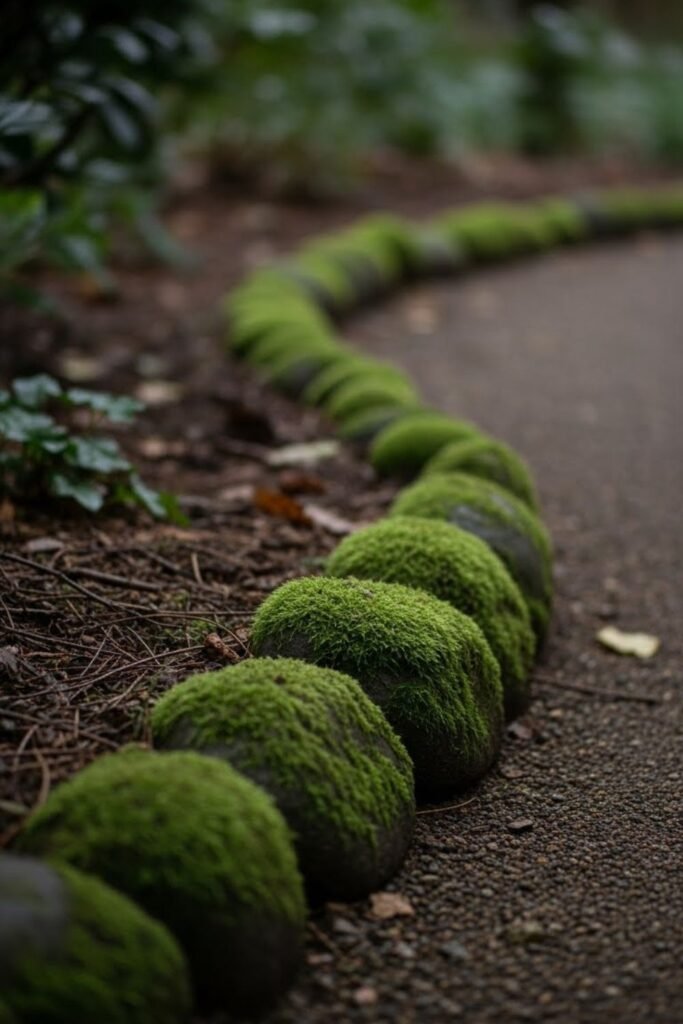
Moss Stone
Shaded areas felt lifeless until moss-friendly stones became my edging choice. I place rough stones where moisture lingers and avoid disturbing them too clearly.
If you like a quiet, woodland feel, this edge grows better over time. Moss softens hard lines and hides imperfections naturally. I never pressure wash these stones because that ruins growth.
This edging works slowly but rewards patience, especially in gardens where shade, moisture, and calm textures dominate the space.
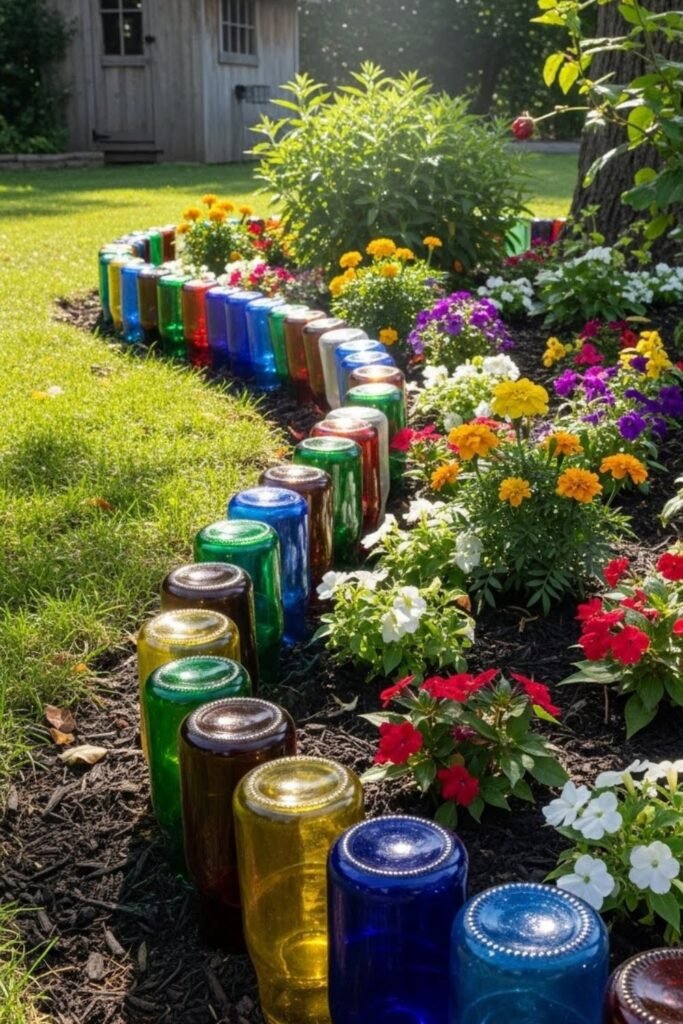
Bottle Border
Saving glass bottles gave me a creative edge without spending money. I bury them upside down with necks deep in the soil so only the base shows.
If you want a playful accent, this catches light beautifully. Consistent spacing matters to avoid looking messy. I use bottles of the same size for balance.
This edge works best in informal gardens and raised beds where visibility adds charm without becoming distracting or unsafe for kids or pets.
Timber Line
Long timber planks helped me define straight edges quickly. I set them along beds and secure them with steel stakes driven deep.
If you want a clean border without stacking materials, this works well. Treated wood lasts longer, especially near damp soil. I keep the height low to avoid a boxed-in feel.
This edge suits modern layouts and keeps mulch contained while offering flexibility if changes are needed later.
Dual Level
Separating lawn and pathway felt easier once I created a two-step edge. I lower the lawn side slightly and raise the path edge just enough to block spread.
If your spaces blend too much, this adds order. Different heights guide movement naturally. I use compacted soil or stone to hold levels steady.
This approach reduces mess, improves drainage, and makes transitions feel intentional without needing decorative materials or heavy installations.
FAQs
Can garden edging really reduce maintenance, or is that a myth?
Yes, edging can cut down maintenance if it’s installed the right way. When you place edging deep enough to block grass roots, you spend less time trimming and fixing borders.
The mistake many people make is installing edging too shallow, which lets grass creep back within weeks. Strong placement matters more than expensive materials.
Is it better to install garden edging before or after planting?
Installing edging before planting makes everything easier. When borders go in first, you avoid disturbing roots later and get cleaner lines from the start.
Planting first often forces awkward adjustments and uneven edges. Setting the boundary early helps you plan spacing better and keeps the garden looking intentional as plants grow.

Hi, I’m Afaf! I’m a law student who loves all things home, style, and gardening. I’ve been writing for over a year about topics like home decor, DIY projects, plants, fashion, and beauty.
I like sharing ideas that are easy to try and don’t cost a fortune. Whether it’s organizing a messy closet, decorating on a budget, or keeping houseplants alive, I write about what I’ve actually tried myself.
When I’m not studying, I’m usually on Pinterest looking for my next project or adding another plant to my collection!