
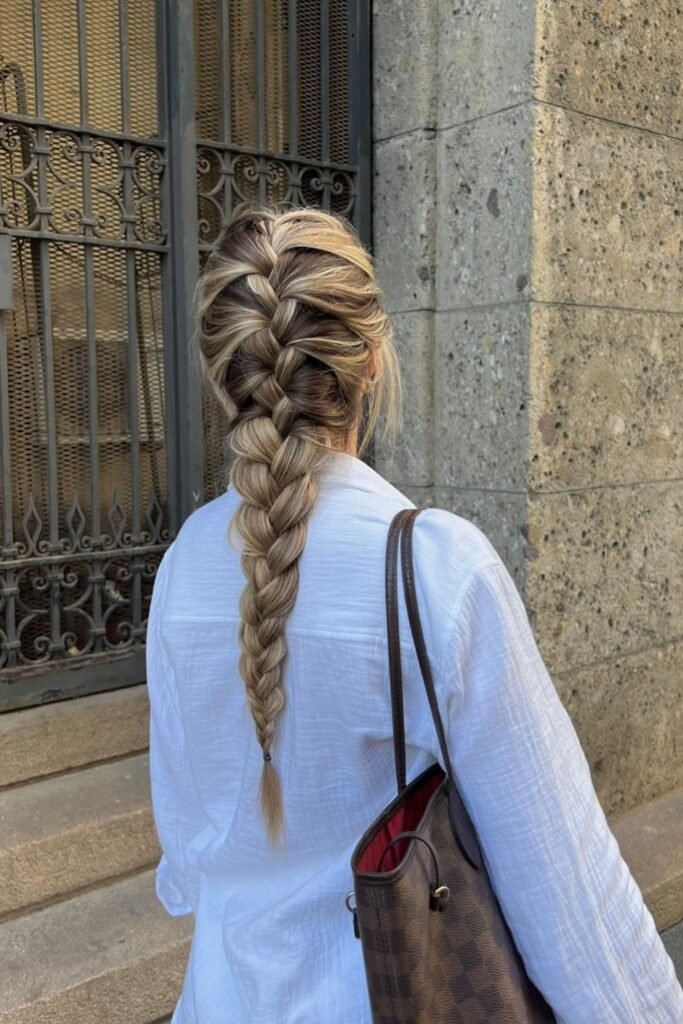
French Braids Are Trending Again – Here’s How to Get the Look
Let’s be honest-French braiding your own hair seems easy until you actually try it.
You grab three sections, cross them a few times, and suddenly it is chaos.
One side is too tight, the other is falling apart, and your arms feel like they have been lifting weights for hours.
You are not doing it wrong-you are just missing the little details no one talks about.
What You’ll Need to Start
If you want a perfect french braid then you must use the right tools and product because they will make a huge difference when you are doing a french braid.
Skipping this step is why many French braids fall apart or end up looking uneven. It becomes even more critical if you want to try a dragon braid.
This style requires a firm grip, good control, and neatly divided sections.
Here are the product and tools you will need to do a french braid:
- A brush or wide-tooth comb
- A rat-tail comb
- Dry shampoo or texture spray
- Small elastic bands
- Hair clips or ties
Prep Your Hair the Right Way
1) Start with the Right Hair Condition
Do not braid freshly washed hair because it is usually too soft and slippery. Dry or slightly dirty hair gives you better grip for braiding.
If your hair is very clean, for better hold spray in a little dry shampoo or texturzier before you start.
2) Detangle Your Hair
Make sure your hair is tangle-free by brushing it out first.
Pay close attention to the areas at the top and the back-these are the sections where you will start braiding.
If you skip this step, the sections may pull unevenly and end up looking messy.
3) Tame Frizz and Flyaways
Take a brush or a wide-tooth comb and gently get rid of any knots.
Look carefully at the top and back of your head, because you will start braiding these spots first.
If you skip this step, your sections might pull unevenly and end up messy.
4) Decide on Your Part
Take a brush or a wide-tooth comb and gently remove any tangles.
Check the top and back of your head closely, because you will start braiding these areas first.
If you skip this step, your sections can pull uneven and look messy.
5) Clip or Tie Extra Hair
Use clips or ties to keep any unused hair out of the way.
This step will help you to stay organized and makes it easier to create sections when you begin braiding.
Here are some related articles you might interested in:
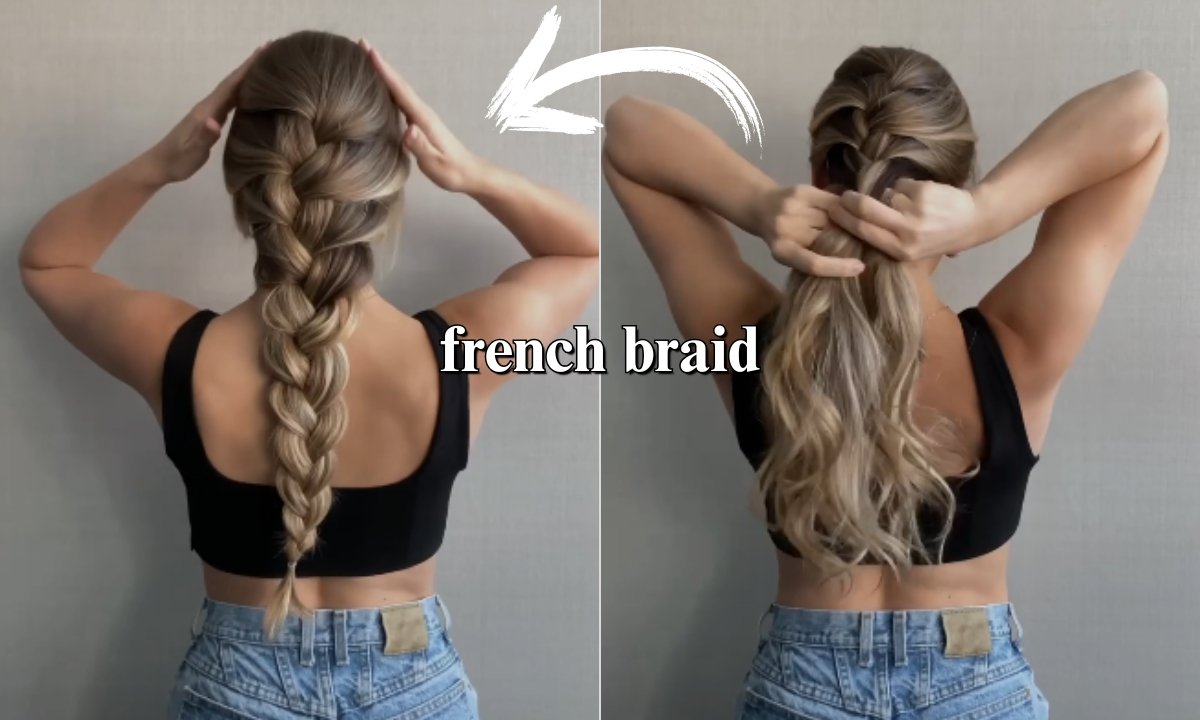
Step-by-Step: French Braid Tutorial
Step 1: Start with Three Sections
Take a section of hair from the top center of your head.
Divide it into three equal parts – one on the left, one in the middle, and one on the right.
Keep each part separate by holding them between your fingers.
Step 2: Cross the Right Over the Middle
Pick up a section of hair from the top center of your head.
Split it into three even parts-one on the left, one in the middle, and one on the right.
Hold each part apart with your fingers.
Step 3: Cross the Left Over the Middle
Take a section of hair from the top center of your head.
Divide it into three equal parts – one on the left, one in the middle, and one on the right.
Use your fingers to keep each part separate.
Step 4: Add Hair to the Right
Before crossing again, take a small section of loose hair from the right side of your head.
Add that hair to the right strand. Then cross it over the middle, just like you did before.
Step 5: Add Hair to the Left
Take a small section of hair from the left side. Add it to the left strand. Cross the left strand over the middle one. Repeat these steps as you continue.
Step 6: Work Your Way Down
Repeat the pattern: add hair to the right, cross it over, then add hair to the left, cross it over.
Keep your hands close to your scalp, and pull gently to keep the braid tight.
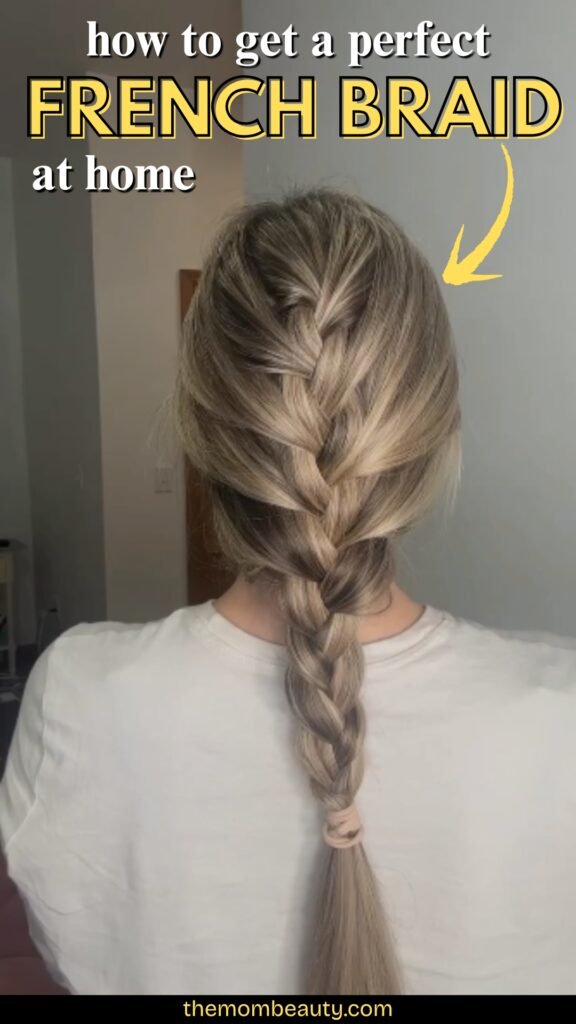
Step 7: Finish the Ends
Once you have no more loose hair to add, keep braiding the rest of the hair using a regular three-strand braid.
Continue braiding all the way to the ends, and secure it tightly with a small elastic band.
Fixing Common Mistakes
If your braid feels loose, move your hands closer to your scalp and tighten each cross.
A crooked braid usually means your part or sections are uneven-use a comb to fix it and stay even.
Is your hair too slippery? Add some dry shampoo or texture spray to give it more grip.
If one side looks thicker, it is likely because you added more hair on that side.
Tips Based on Your Hair Type
- If your hair is straight or silky– Spray some dry shampoo or texture spray before you begin. This gives your hair grip and keeps the braid from slipping out of place.
- If your hair is wavy or thick – Take your time and work in small, neat sections. This prevents the braid from becoming bulky or uneven.
- If your hair is textured or curly – Stretch it out or lightly blow-dry it first to make braiding easier. Use a little leave-in conditioner to keep the strands smooth and frizz-free.
- If you have layers – It is normal for shorter pieces to stick out. Once you are done, tuck them in with bobby pins.
- If your hair is fine or thin – Avoid pulling the braid too tight. When you are finished, gently loosen the braid to make it look fuller without falling apart.
Save this article for later! 👇👇
Final Thoughts: You’ll Get Better
Your first French braid won’t be perfect-and that’s okay. It might look a little crooked, come loose halfway down, or take longer than it should.
But the more you practice, the easier it gets.
Your hands will move faster, your sections will look cleaner, and the whole process will feel natural.
Hi, I’m Afaf! I’m a law student who loves all things home, style, and gardening. I’ve been writing for over a year about topics like home decor, DIY projects, plants, fashion, and beauty.
I like sharing ideas that are easy to try and don’t cost a fortune. Whether it’s organizing a messy closet, decorating on a budget, or keeping houseplants alive, I write about what I’ve actually tried myself.
When I’m not studying, I’m usually on Pinterest looking for my next project or adding another plant to my collection!